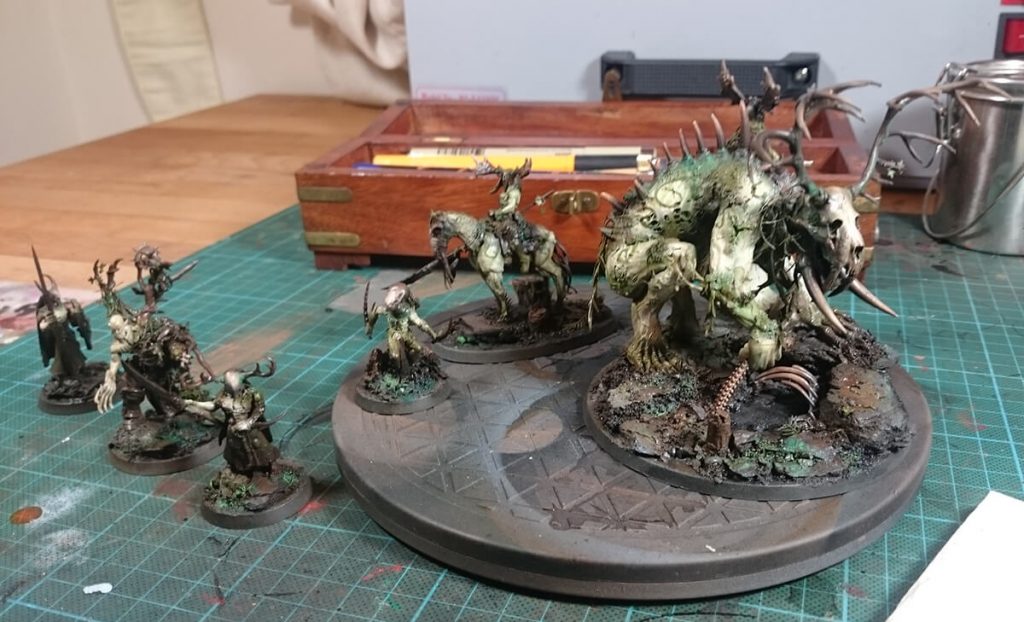
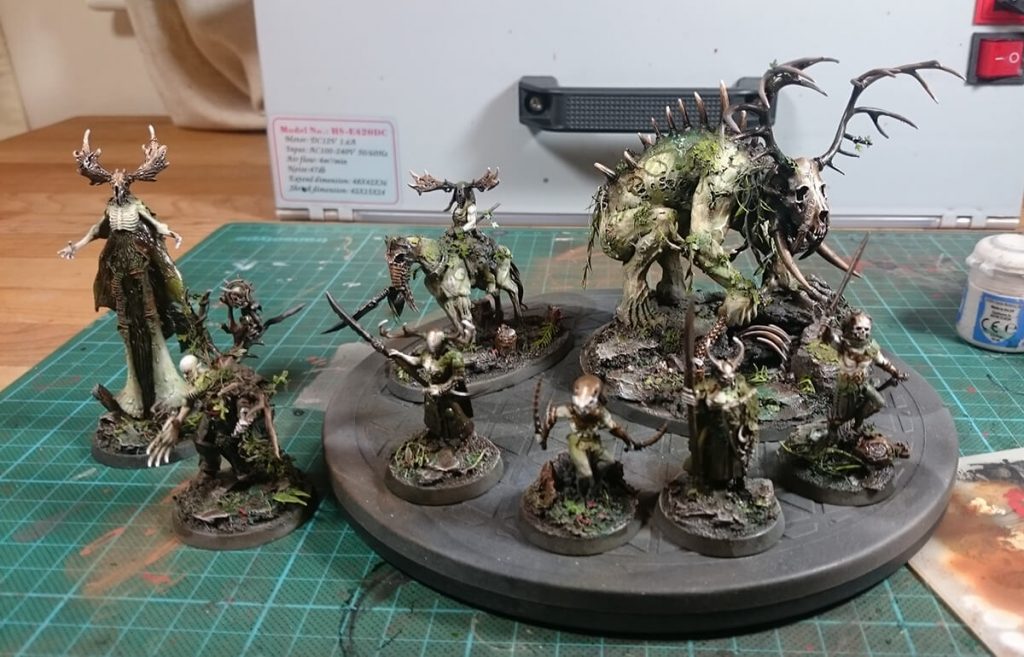
I’ve had a few requests to do a tutorial and I remembered to take some photos of my Aelves as I was painting them. I don’t really pay attention to paint names, and I mix my own a lot as I go, often from the Vallejo Model Air range as well as Citadel. For the most part this project went pretty quickly as I was able to do all the basecoating (bar some leaves) using the airbrush. The goal then is to make it look as unlike an airbrushed model as possible by roughing things up a bit. For me, the airbrush is a great time saver, but it’s not a good look, particularly when the goal was to make something that looks natural. I used a lot of very loose brush work and sloppy washes to try and remedy this.
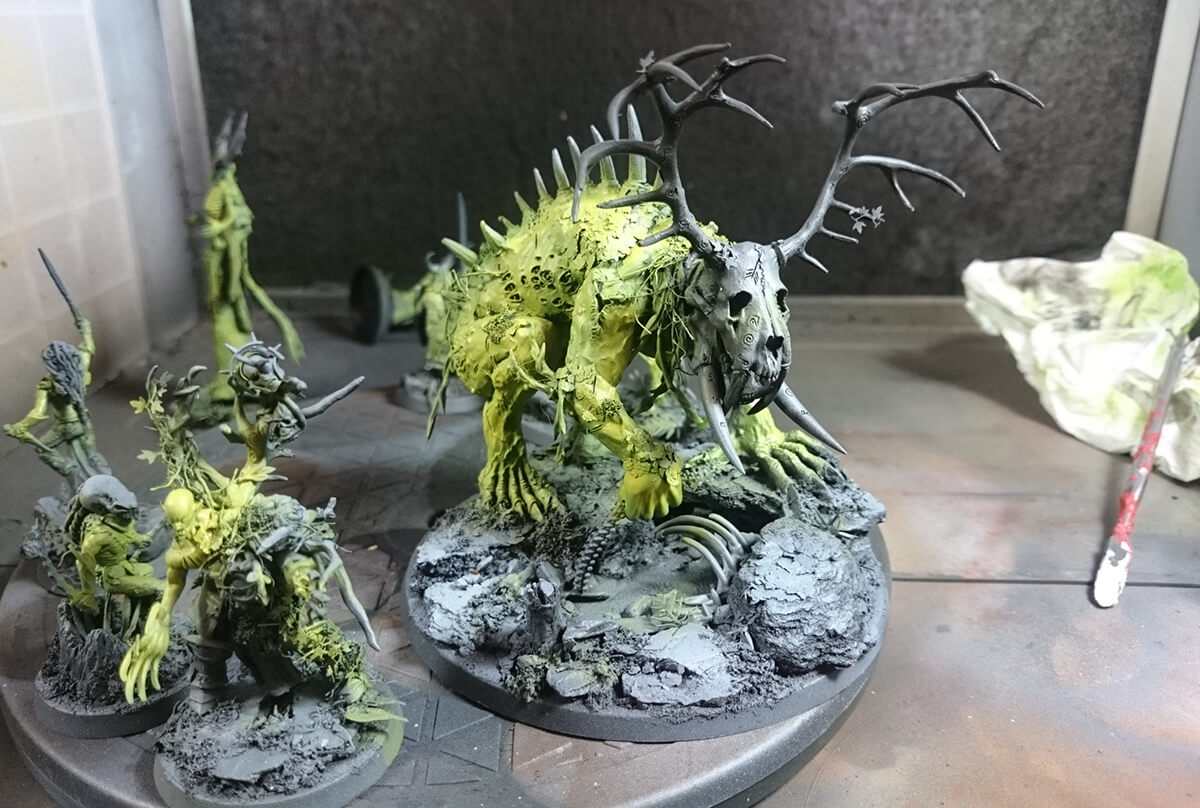
After a black undercoat and a zenithal grey layer, I mixed up a yellow/green colour. It’s worth starting bright because all the other steps will make this darker, which is kind of a shame. At this stage I was quite tempted to add some OSL and extreme edge highlights and sell it on eBay

I used my favourite paint – Vallejo’s Burnt Umber and a few other shades of brown to colour the bones and some parts of the base. I didn’t worry about overspray or masking at all.
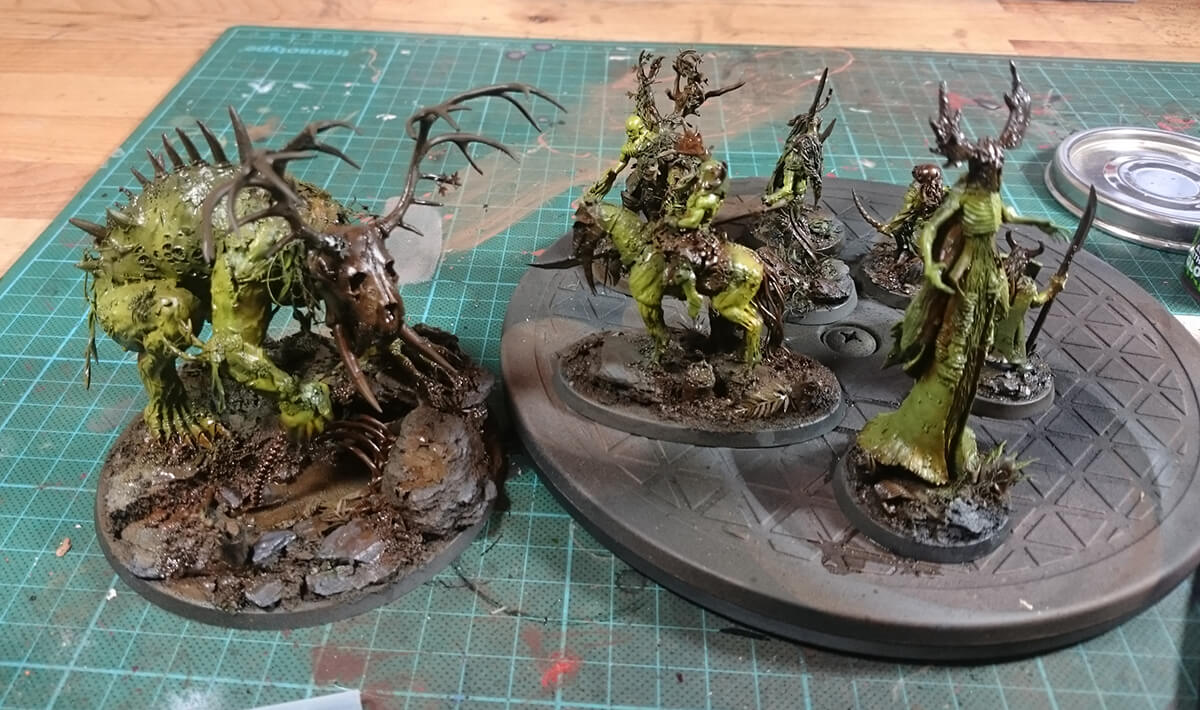
I’m always really impatient to get to the washes, so I added a few here, mostly using the new Citadel gloss washes and concentrating on the bones and areas with lots of detail like the monster’s feet.
Next I used a bright white to colour the skin and some highlights on the bone. I did some quick masking for the patterns, using blu-tak, but I didn’t mask anywhere else, a bit of overspray is fine as I don’t want a very precise looking finish on organic models.
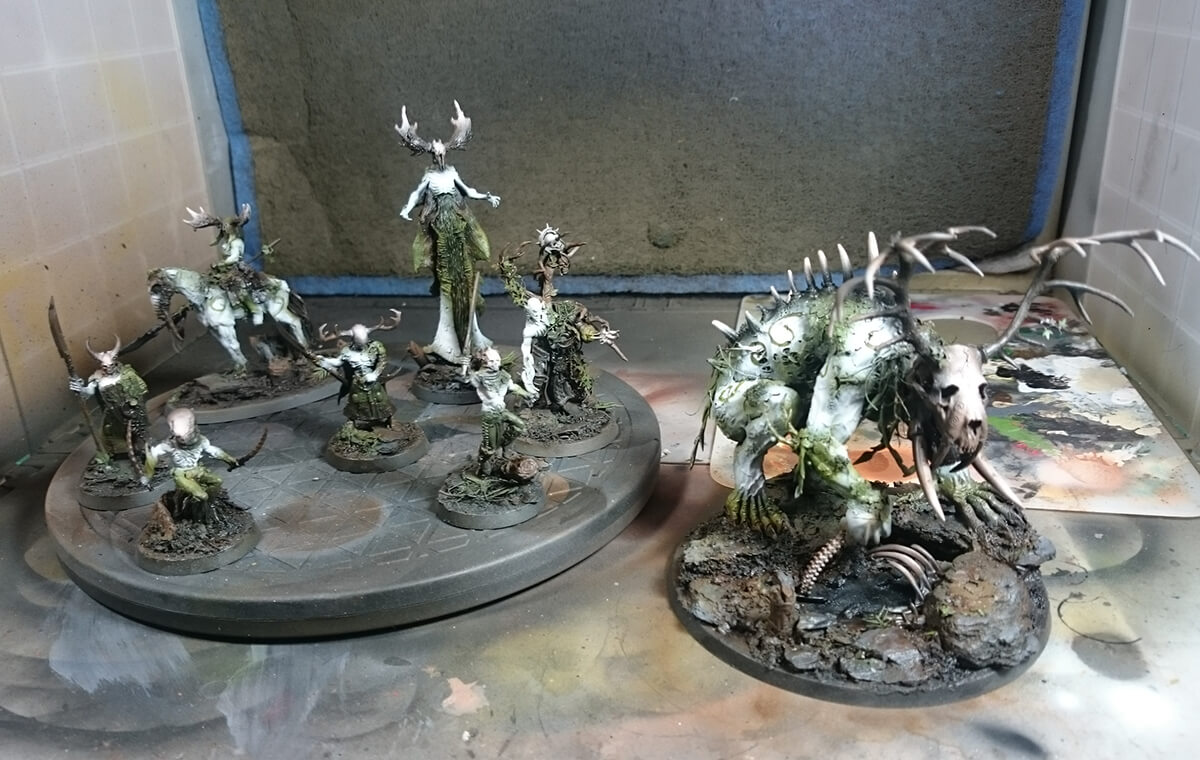
After a layer of gloss varnish I used a Burnt Umber oil wash all over. After it has dried for a little while I wipe some of it off, and spread it around using an old brush, kitchen roll and white spirit – really just to avoid pooling and add some smooth gradients on the skin. The oil paint filters the white and gives it a sepia/off white hue.
I used a couple of other green oils in quite a haphazard manner to add some tonal variety. Nature is never uniform so the messier the better. Then I sealed it all with matt varnish – this killed some of the effect I was after so I painted gloss varnish back onto some areas that I wanted to look wet.
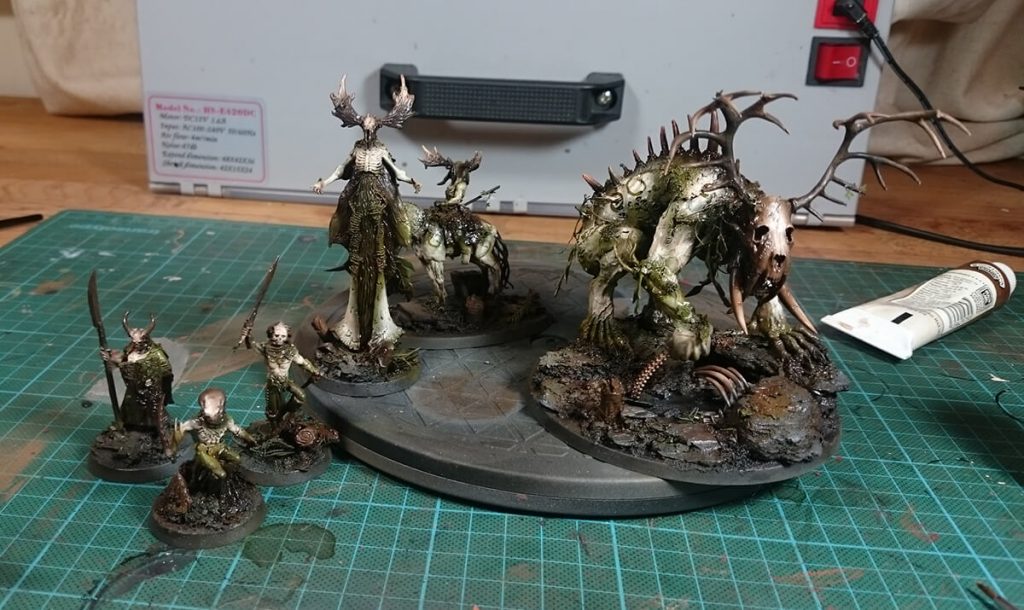
I picked out a few details with green paints, and a bit of red. I splashed a few more washes around for more tonal variety on the bases – I use as many colours as I can find, but very watery. I then drybrushed the bases and edge highlighted the skin and bones with white – this was by far the most time consuming stage, but it is also the first time I really used a brush on this project with any sort of precision. By saving energy using an airbrush to basecoat I find I don’t resent the highlighting stage too much.
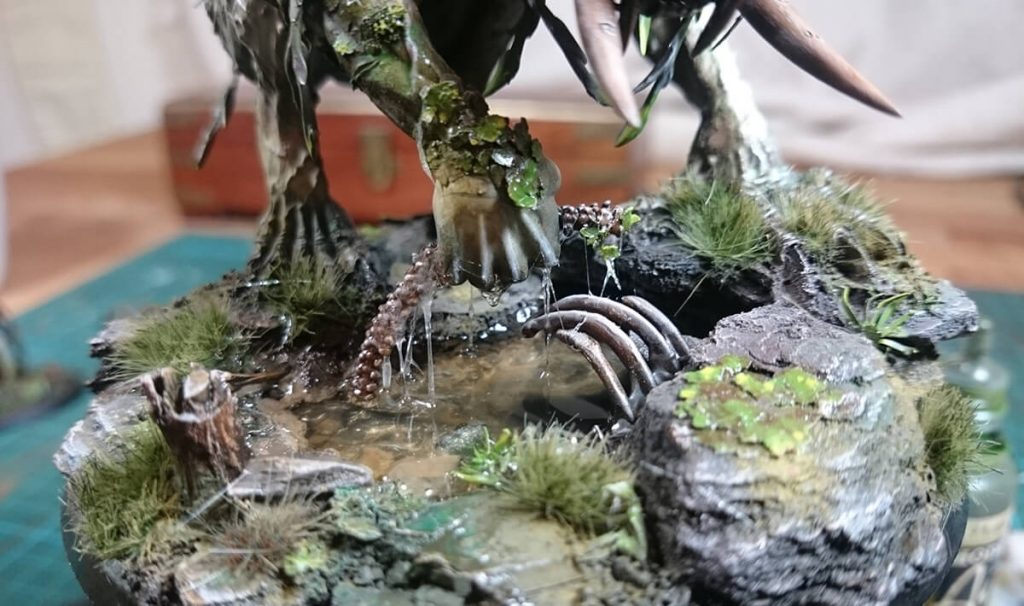
I used a lot of grass clumps which I wash and drybrush, and I also blend them in with weathering pigments. I added water effects and created some dripping water by pulling UHU glue between the water and the bone with a pin. This stage was extremely irritating and I was glad to be finished.
Thanks for an awesome tutorial. It was really interesting to just read about your creative process on these amazing figures.
Very useful thanks! Great result.
Great tutorial, the use of oil washes works really well for the natural, dark style.
Love the finished effect, great to see how you got there! Lol
Really love the style. What model is the horned monster in the middle? I saw it somewhere before but can’t find it via Google. It’s not from GW, is it?
There are some other posts on this site where I talk about how they were made
Such an inspiring tutorial mate.
Where did you get the wines that hang of them? I wanted to try and do a similar thing on a machine that has been overgrown.
Thanks for the tutorial. Thanks to you I got some Vallejo Burnt Umber myself (love it as well) and tried out oil washes for the first time. I tried to follow your steps (without an airbrush though) painting my Skaeth’s Wild Hunt:
https://gangsofmordheim.blogspot.com/2020/04/skaeths-wild-hunt.html
Wow…
Great Job..
Fantastik